DLTK's Educational Activities - Book Report Ideas
Example Diorama - Charlotte's Web
 Kaitlyn made this diorama in Grade Three.
- Her favorite part: making the pig
- Her least favorite part: making the fence
- Her mark: 100%
Materials:
- Basics:
- shoe box
- glue
- scissors
- Background:
- acrylic paint (red)
- powerpoint and color printer
- straw colored (natural) raffia
- Pig (Wilbur)
- sculpey clay
- Spider (Charlotte)
- black pom pom
- small wiggly eyes
- dark wool
- Halloween web cotton
- Fence
- small wooden sticks (like popsicle sticks)
- plasticine
- Stool
- cardboard
- two corks
- Roof
- regular cardboard (ex: old cereal box)
- green posterboard
- corrugated cardboard (we got ours from the scrapbooking
section of the craft store.
The Steps We Took:
You could do this all in one day but we never
procrastinate! It's much more fun (and less stressful) if you do a little
each day for a week.
Day 1:
- Kaitlyn sketched out her ideas on a piece of paper
- Kaitlyn searched through the "craft cupboard" for what we had on hand and for inspiration.
- Kaitlyn made a list of materials she thought she would need - dividing her list into things we had and things we needed to buy.
- Mommy reviewed Kaitlyn's sketch and materials list.
- Kaitlyn painted the entire outside of the box red to look like a barn (we had the red acrylic paint on hand) after covering the table with newspaper.
- Kaitlyn washed her brushes and tidied the kitchen table -- acrylic paint dries in under an hour, so she was able to tidy up without setting anything aside to dry.
Day 2:
- Kaitlyn and mommy sat down at the computer for a lesson on Powerpoint.
- Mommy designed an entire "background" for the walls of the barn while Kaitlyn watched.
- Mommy deleted everything she'd done (to Kaitlyn's horror *grin*) and then Kaitlyn designed her own background for the walls of the barn while mommy watched.
- Kaitlyn printed her design (about 4 sheets), cut her sheets to fit the "walls" of her barn and glued them to the back and sides (inside).
-
 Kaitlyn chopped raffia into small bits (to look like straw)
and glued this all over the floor of her box
Kaitlyn chopped raffia into small bits (to look like straw)
and glued this all over the floor of her box
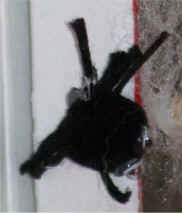
- Kaitlyn glued wiggly eyes and bits of wool to a black pom pom to make a spider -- everything fell off!
- Kaitlyn and mommy hot glued wiggly eyes and bits of wool to a black pom pom -- this time it worked (hot glue!)
- Kaitlyn hot glued Charlotte to the side of her barn, toward the front.
- at this point we had run out of supplies we happened to have lying around the house so we made a trip to our local craft store to pick up sculpey clay, plasticine, wooden sticks and corrugated cardboard.
Day 3:
-
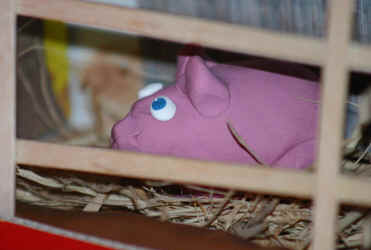 Kaitlyn made her pig with sculpey clay
-- one large oval for the body, four stubby cylinders for legs, pinched triangles
for the ears and a coiled snake for the tail. Bits of white and blue made the eyes.
Kaitlyn made her pig with sculpey clay
-- one large oval for the body, four stubby cylinders for legs, pinched triangles
for the ears and a coiled snake for the tail. Bits of white and blue made the eyes. - Instruct children to jam their pieces together firmly (so the figure doesn't fall apart after baking
- Instruct children not to leave any "skinny pieces" sticking out (for example, make sure you push the tail against the body) -- skinny pieces will break off easily
- Instruct the children to make sure the piece stands up before you bake it (make the legs short and stubby, not wobbly and skinny).
Day 4:
- after a lot of trial and error -- mom, dad, grandpa and Kaitlyn managed to build a fence for Wilbur
- Clumps of plasticine were hotglued to the bottom of the shoebox floor
- Kaitlyn pushed her fence sticks into the plasticine to act as fence posts
- The fence cross pieces were hot glued to the fence posts -- everyone got a bit burned during the process (make sure you use a low-temp crafting hot glue gun not a carpentry one so that no one gets seriously injured)
Day 5:
- Kaitlyn and daddy made the stool:
- Daddy sawed two corks in half -- to make four corks half as tall
- Kaitlyn glued a square of cardboard to the four half corks
- Kaitlyn used a very creative swirly painting technique (with red and brown acrylic paint) to decorate her stool.
Day 6:
-
 Kaitlyn made her roof -- it was very challenging.
 - She traced her shoebox onto a piece of cardboard and added a "Hip roof" type shape to the top.
- She cut out this cardboard shape and glued it to the back of her shoebox
- Kaitlyn cut a piece of green posterboard (as long a strip as possible) as wide as the shoebox -- she left "tabs" on the posterboard.

-
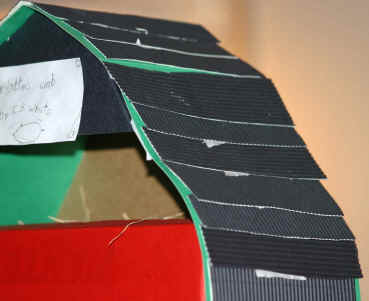 Kaitlyn draped her green posterboard over her roof and
folded the tabs around the cardboard and taped them on
Kaitlyn draped her green posterboard over her roof and
folded the tabs around the cardboard and taped them on - Kaitlyn cut "shingles" from corrugated cardboard.
- Starting from the bottom of the roof, she taped these onto the green posterboard, overlapping each a little so it would look like a shingled roof
Day 7:
-
 Kaitlyn did a few final touches, arranging all her
characters as she liked them
Kaitlyn did a few final touches, arranging all her
characters as she liked them - She wrote out her name, the name of the book and author's name and attached this "label" to the front of her project
Print friendly version of these instructions